Subversion

switched to svn via https on mac os x

I finally decided it is time to switch to accessing subversion repositories via apache and the https scheme rather than ‘file://’ scheme. Search revealed many articles touching the subject, but none providing exactly what I need. So documenting:

  1. The problem and motivation
  2. Up to date?
  3. Getting apache to serve https
  4. Configuring apache to serve subversion
  5. Migrating existing working copies to the new scheme
  6. Reference links to articles that helped

Problem and motivation

My main development machine is a Mac Pro running 10.6.4. My development projects are all kept outside my home directory on a second disc, one project per folder. Each project folder contains a subversion repository folder named ‘svn’ along with one or more working copies.

For the last few years I have checked out working copies using the ‘file://’ protocol. This seemed the simplest and most efficient approach in this single-user environment. I use svn clients such as SvnX, and Subclipse and occasionally the command line (for which having the svnbook to hand is a must). I have groaned previously about DreamWeaver’s subversion integration ‘attempt’ failing to support the file protocal (remains unchanged in CS5).

There are a couple of things I want to solve:

Firstly, I occasionally use VisualStudio in Windows7 running in parallels on this machine to work with ASP.NET. In the past I’ve simply pointed it at the working copy via the network drive. Of course this means that I can’t undertake svn operations through Win7 since that working copy’s URL is alien to the Windows 7 instance. Not too much of an issue since it’s only a matter of switching back to a Mac window to do svn business. However there is an annoying problem with VisualStudio’s code completion where it is unable to correlate markup within an .aspx file with it’s .aspx.cs file when the site is on a parallels network drive. To solve this I need to check out a working copy to the Windows7 local disk.

Second, I have taken to getting out and about with my MacBook Pro. If I want to work on the move I need to check-out a working copy.

For both these situations using the ‘file’ protocol is inappropriate. Attempts to check work back in are bound to generate svn errors as multiple svn systems attempt to obtain exclusive locks on the repository.

If however we can get to a single user/process touching repository files we can solve this problem – enter apache.

Up to date?

First thing I did was get my subversion installation up to date. At time of writing 1.6.12. Installer available from CollabNet. Just run the installer and follow the instructions. Note: this version installs into a different location to that installed by Apple. You may need to tell your client tools the location of the subversion to use.

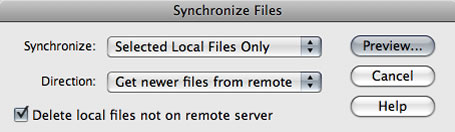
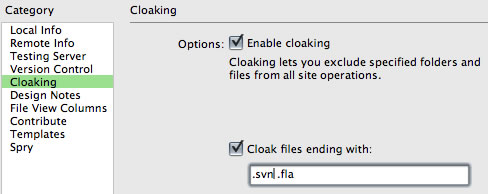
That said, this isn’t going to help with DreamWeaver all that much. DW’s Subversion functionality is tightly tied to specific versions. Should you dare  touch a working copy with a later version (which changes some of the meta data) DreamWeaver will cease to work with that working copy. More information at this Adobe technote. So for now as far as I am concerned, until Adobe start releasing ‘upgrader extensions‘,  DW’s subversion functionality remains useless and turned off with ‘.svn’ files cloaked and svnX used for commits.

Getting apache to serve https

In the short term I have no plans to open access to my repositories via the net. However it is a future possibility so I think it worth getting going with https from the outset is worth it.

Mac OS X of course uses Apache for web-sharing. However it’s default state is not configured to serve SSL. To do so, we need a secure certificate and some configuration changes. As I am the only person accessing this machine, and I trust myself, I have no need to obtain a certificate from a commercial authority.

Steps taken to create the certificate and configure apache to use it…

Create a certificate authority

mkdir /Library/Certs
cd /Library/Certs
perl /System/Library/OpenSSL/misc/CA.pl -newca
[ENTER](to create new certificate)

Generate private key

openssl genrsa -des3 -out webserver.key 1024

generate a non-password protected copy of the key

openssl rsa -in webserver.key -out webserver.nopass.key

Generate a certificate request

openssl req -config /System/Library/OpenSSL/openssl.cnf \
-new -key webserver.key -out newreq.pem -days 3650

Sign the certificate request

perl /System/Library/OpenSSL/misc/CA.pl -signreq

You should now have created…

/Library/Certs/demoCA/
/Library/Certs/newcert.pem
/Library/Certs/newreq.pem
/Library/Certs/webserver.key
/Library/Certs/webserver.nopass.key

Tell Apache to include SSL

We now need to edit apache’s httpd.conf. You need to ‘sudo’ to acquire sufficient privileges to do so, and need to take care. Optionally make a backup copy of httpd.conf.

cd /private/etc/apache2/
sudo cp httpd.conf httpd.conf.bak
sudo pico httpd.conf

Find the following line and uncomment it by removing it’s # prefix

Include /private/etc/apache2/extra/httpd-ssl.conf

Use CTRL-O then CTRL-X to exit pico and we now need to edit the file we just included…

cd extra
sudo pico httpd-ssl.conf

Go through the file finding the following attributes ensuring they are uncommented and point to the SSL files we just created…

SSLCertificateFile "/Library/Certs/newcert.pem"
SSLCertificateKeyFile "/Library/Certs/webserver.nopass.key"
SSLCACertificateFile "/Library/Certs/demoCA/cacert.pem"
SSLCARevocationPath "/Library/Certs/demoCA/crl"

You should now be able to restart apache either through System Preferences… > Sharing > Web sharing, or

sudo apachectl graceful

You can access any errors via the Console application. If all is well you should be able to enter https://localhost/ into your browser’s address bar and get a result.

Configuring apache to connect to and serve subversion

Firstly, we are going to require a login. In my case I am going to create 3 login IDs. One for my normal workstation. Others for access via Win7 and my MacBook pro. So although all the work in the repro is by me, I can see which environment was used.
To do this, we will create an authorisation file containing the three users and place it somewhere sensible. For me…

cd /Volumes/projectdisc/projects
mkdir subversion
cd subversion
mkdir authfile
cd authfile
sudo htpasswd -c svn_passwd mpuser
sudo htpasswd svn_passwd mbpuser
sudo htpasswd svn_passwd win7user

you should now have svn_passwd contianing 3 users and their password hash strings. Returning to apache configuration, you may have noticed that the last line of httpd.conf reads…

Include /private/etc/apache2/other/*.conf

This includes, in alphabetical order, any further files ending .conf in the subfolder ‘other’. We will use this to add a svn.conf file to that folder…

cd /private/etc/apache2/other
sudo pico svn.conf

Will open an editor with empty/new file svn.conf. The first line of which will be:

LoadModule dav_svn_module /usr/libexec/apache2/mod_dav_svn.so

After this, we will add configuration blocks, one per project repository…

<Location /svn0000-svntest>
DAV svn
SVNPath /Volumes/projectdisc/projects/0000-svntest/svn
AuthType Basic
AuthName "subversion"
AuthUserFile /Volumes/projectdisc/projects/subversion/authfile/svn_passwd
Require valid-user
SSLRequireSSL
</Location>

Using keys ctrl-o then ctrl-x will save the new file and exit pico.

This configuration block tells apache to redirect svn0000-svntest to the repository at path /Volumes/projectdisc/projects/0000-svntest/svn. It requires a valid user authenticated against the file at /Volumes/projectdisc/projects/subversion/authfile/svn_passwd. Since this location will only ever be served through SSL, basic AuthType is ok and secure.

For apache to pick up this change, we need to restart it:

sudo apachectl graceful

One further step we need to make is to ensure apache is the only user/process to have control of the repository files. This shouldn’t be an issue as we are migrating access to be always via https and don’t want the file protocol used any more…

cd Volumes/projectdisc/projects/0000-svntest/
sudo chown -R www:www svn

At this point you should be able to access the repository through your browser with url http://localhost/svn0000-svntest

You will receive an alert indicating that the certificate is not trusted. You can tell safari that it should always trust this certificate.

To add further repositories, we simply need to change ownership as above, then add the detail to the configuration by simply duplicating the code block above with the Location text and SVNPath modified accordingly. The rest can remain as is.

Migrating existing working copies to the new scheme

My existing working copies each use the file:// url scheme. We need to convert them to use the new https scheme. This is pretty easy assuming you already have the Location added to svn.conf. Just cd to the working copy folder, use svn info to reveal the working copy’s url and relocate…

cd Volumes/projectdisc/projects/0000-svntest/wc
svn info
svn switch --relocate file:///Volumes/projectdisc/projects/0000-svntest/svn/trunk/wc https://localhost/svn0000-svntest/trunk/wc

If you are prompted that the certificate is invalid, use option p to permanently trust the certificate.

Reference links to articles that helped

Reading the following, articles that helped me work out what I wanted to do…

Along with chapters 3 and 10 of Subversion Version Control: Using The Subversion Version Control System in Development Projects ISBN-10: 0-13-185518-2 also on Safari books online.

Posted by creacog in Apple, Mac OS, Subversion, 0 comments

updated svn+ssh with DreamWeaver article

After various Mac system and security updates found that ssh+svn would result in errors…

svnserve: Command not found.
svn: Connection closed unexpectedly

Updated my previous article on using svn+ssh with DreamWeaver with a solution.

Posted by creacog in Adobe, DreamWeaver, Mac OS, Subversion, 0 comments

Adobe DW subversion guides – please don’t forget deletion!

Wishing those at Adobe writing about DreamWeaver’s wonderful subversion integration would not keep omitting Deletion. Perhaps it is because deletion is not implemented in any automated sense (link) in DreamWeaver’s subversion client and the only sensible way to manage deletions or indeed renames (which as far as subversion is concerned is delete old file and add new file) is to use a 3rd party client. In my opinion this is all the more reason to mention this in articles like that in December’s EDGE “A guide to Subversion integration in Adobe Dreamweaver CS4”. Failing to provide notes on file deletions and file renames is going to leave newbie subversion users in a bit of a mess, with old files hanging around, or being restored when not expected following a revert.

My earlier notes related: Dreamweaver CS4, Subversion and site Synchronize. Two cautions.

Posted by creacog in Adobe, DreamWeaver, Subversion, 0 comments

Dreamweaver CS4, Subversion and site Synchronize. Two cautions.

The following notes assume three file sets: A: the remote site; B: The local site; C: The repository.

We are linked to the repository using  the SVN+SSH method I discussed yesterday.

Caution 1

In this particular site, I have a folder within which server-side code generates and deletes server-side text files and modifications to MS Access databases. It is therefore necessary to sync from the server to the local copy.  This is done using the settings: Get newer files from remote, and delete local files not on remote server. As in the following dialogue.sync

However in my particular site my preview list of files appeared as follows. Can you spot what’s wrong?!

preview

By linking your local site to a subversion repository, you make that local site folder a working copy. This creates a host of hidden files within your local site folder which are used to coordinate synchronisation with the repository. These files should only ever be touched by Subversion. Dreamweaver however has decided in its synchronisation process to check to see if each of these files are on the remote server. Of course they are not – nor ever should be. Dreamweaver has then listed them for deletion!

Important: DO NOT ALLOW ANY OF THESE FILES TO BE DELETED as part of this sync-down. Doing so will break your working copy and break your local site’s sync with the repository.

Of course in the preview list you can go through and set the files you wish not to be afftected to be skipped as I have in the following snapshot…

skip

Clearly from the above Dreamweaver has not only given me a huge list to work through, but in doing so has wasted a whole load of time – the FTP commands for checking 900 files are quite time consuming.

I’m not sure why Dreamweaver is including .svn files in this particular synchronisation effort. I can think of no use-case where this would be desired. Dreamweaver is smart enough not to attempt to sync .svn files when updating to the remote server rather than from the remote server.Therefore I suspect this is an over-sight, and I have logged it as a bug via the Adobe Bug Report Form.

There is a quicker safer way to avoid .svn files being sync’d in this way, and that is to use cloaking. For each site at issue, right-click the site’s root folder and choose  Cloaking > Settings…, then enable cloaking and add .svn to the file list…

Cloaking

Caution 2

Deleted site files, either deleted via a sync operation or direct deletion in the Files window, do not get committed to the repository on your next ‘check-in’. In fact so far I have not seen any way for Dreamweaver to inform the repository of deletions and I am currently relying on 3rd party tools to undertake the commit. In my case I use SCPlugin and commit the site folder, at which point it will list the deleted files as ‘missing’. Selecting those and hitting commit records them as deleted to the repository.

Maybe I’m missing something as this seems a major omission of basic functionality. It is quite dangerous for deletions not to get properly recorded to the repository, running the risk that the deleted files may be inadvertently restored to the local copy and eventually to the live site.

Update (4 November 2008):

Having found the documentation, it is clear that Dreamweaver’s subversion integration really does not extend to committing deletions to the repository. They need to be done either manually or through a 3rd party tool as I describe above. Pretty unfriendly for anyone new to subversion and quite different from the workflows used within dreamweavers for sunchronistion between local and remote sites for instance. Personally I think the documentation should explain this fact much far prominently as well as describing in more detail how manage deletion and renaming if connected to subversion.

Posted by creacog in Adobe, CS4, DreamWeaver, Subversion, 6 comments

migrate from file to svn+ssh for Dreamweaver CS4 on Mac

I’ve been using subversion for a few years now. Initially used through subclipse within Eclipse/Flex Builder then later also used with Dreamweaver sites using tools such as svnX and scplugin along with the “Cloak SCM directories” command. In most cases to date, I have used the “file:///” protocol as this provides direct and efficient access to repositories which are available within the local system or local area network. I had been looking forward to subversion integration in Dreamweaver and when the CS4 public beta was released I had a bit of a moan about the absence of the file protocol. Despite my efforts in the beta’s forum and the Dreamweaver wish-list, it remains absent. So now to look to using a different protocol.

There is a helpful 3 part article on the Adobe site describing how to get started with dreamweaver CS4 and svn. In part 3, the author chooses to present how jump through the hoops to get Apache to serve and access a local repository over http. There are a number of reasons why this approach is not right for me:

  1. svn served using mod_dav_svn through Apache over http is less efficient than svnserve through ssh.
  2. I have multiple repositories, one per project and all stored on a separate project disc. To use the http method, I would need to edit httpd.conf to add a directory mapping and manage access rights for each repository.

By using svn+ssh, svnserve launches on demand (no need for a running daemon) and we have access to all the paths available to the ssh user logged in.

So, to get this going on Mac OS X 10.5…

Turn on ‘Remote Login’ in the ‘Sharing’ system preferences. Rather than using the default of allowing access for all users, I restricted access to only my user.

At this point you should be able to use sv+ssh urls from within terminal. e.g.

% svn info svn+ssh://[email protected]/Volumes/full/path/to/repository

However if you try to use the same connection in a tool such as svnX you are likely to get error : ssh_askpass: exec(/usr/libexec/ssh-askpass): No such file or directory

To get around this we really need to establish public key authentication, which also serves to avoid you having to use your user account’s name and password for the connection.  Based upon this article on OpenSSH, I did the following:

% cd
% cd .ssh
% ssh-keygen -q -f id_rsa -t rsa

If the .ssh directory doesn’t exist, then use mkdir to create it. ssh-keygen creates both public and private keys.

Update 16-Feb-2009: Since writing this and applying an number of mac system and security updates i today found that any attempt to ssh+svn would result in…

svnserve: Command not found.
svn: Connection closed unexpectedly
[exit=1]

To solve the issue (based on notes here and here) I prefixed line 1 of id_rsa.pub with:

command="/usr/bin/svnserve -t"

As this is my one and only public key, I simply uses the following line to copy the public key to a file called ‘authorized_keys’. However if you are dealing with more than one key, you should use the guaidance in the OpenSSH article to append the key to that file.
%  cp id_rsa.pub authorized_keys
Once this has been done, attempting to use your svn+ssh  url within svnX should now work. Note: you may get the error re-displayed, but it will dismiss to be replaced by a current view of the repository. Also the first time, you will be prompted for the password. Here you need to enter the passphrase you used when you created the rsa key. I chose for this to be remembered in my keychain to avoid having to retype it in future.

With this done, you are now ready to contemplate setting up Dreamweaver. You need to be aware that an subversion working copy knows the url to the repository from which it was checked out. If your existing DW local copies of sites are subversion working copies checked out like mine via the ‘file:///’ protocol, you need to migrate them to ‘svn+ssh://’ so:

  1. Firstly ensure that everything you need to retain from your working copy has been committed to the repository
  2. Drag your working copy to the trash
  3. Create a new folder to contain your local site
  4. In Dreamweaver create a new site and manage the settings accordingly, pointing the local site to the folder you just created.
  5. In the version control category of the site definition, choose ‘Access Subversion’
  6. Protocol SVN+SSH
  7. Server address is your local computer. i.e. ‘computername.local’
  8. Repository path is a full path to the repository then further on down to the folder containing the site. In my case, each repository is split into trunk, branches and tags folders, and my site folder named ‘webroot’ is a sub-directory of trunk. So my path will read:  /Volumes/full/path/to/repository/trunk/webroot
  9. Server port remains default
  10. Provide your user name
  11. Leave password blank. The connection will be authenticated using the RSA public key
  12. Click the test button and you should get the message “Server and project are accessible!”
  13. CLick ‘Ok’, to leave the site definition
  14. In the file view, right-click the site folder and choose Version control > Get latest versions
  15. The latest versions of the files in the repository will be checked out of the repository into your local folder which will now become a working copy.

Job done.

Posted by creacog in Adobe, CS4, DreamWeaver, Mac OS, Subversion, 3 comments

CS4 betas

I’m not usually one for echoing release announcements. Herewith one minor exception. With the arrival of a number CS4 betas on labs I was please to see “Subversion integration” being a new feature of DreamWeaver CS4. After a history of making simple Zip snapshot backups, and more recently using subversion along with the “Cloak/Uncloak SCM directories” extention and client tools such as SvnX, and SCPlugin it will be interesting to see how well the integration has been done. Looking good from the description.

Update: Unfortunately looks like Subversion is only supported through a server in this release. I really need it to be able to use the “file:///” protocol to access repositories on my local system without having to set up a server. Here is my entry on the Dreamweaver Beta Forum, feel free to add to it if you have opinions one way or the other.

Posted by creacog in Adobe, CS4, DreamWeaver, Subversion, 4 comments