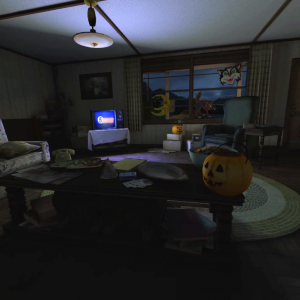
Amaze: Redway manor
Amaze viewer app: https://www.oculus.com/experiences/go/1230799313655858/
A lot of the initial content with the amaze app seems to consist consists of dancers, pole dancers, and other young ladies demonstrating yoga and similar, along with some more vlogger style unusual experiences. Redway Manor however is more sophisticated.

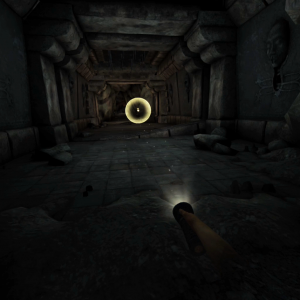
The user experience is Point of View. Sometimes you are seeing through the eyes of the protagonist, other times you are fly on the wall. After each scene is acted, you are presented with interactive choices of who to speak to next, allowing for different routes through this story. The visual and sound quality is all good with hints of AR mixed into this VR world (as in the screen shot above). In some scenes, the actors not directly involved in the immediate action do have a challenge to behave naturally.
View a trailer over on YouTube: REDWAY MANOR | Official VR Trailer (AmazeVR)
Tomb raider
https://www.oculus.com/experiences/gear-vr/1759965414055326/
While the gameplay is linear, there are interactions required, and it is possible to fail. You are being chased, and take to take too long navigating or solving the puzzles and the Trinity soldiers will shoot at you. The laser pointer is replaced as the game progresses with a torch, climbing grapple or bow and arrow. Simple fun.
Dead and buried
https://www.oculus.com/experiences/go/1490394380970763/

Beautifully crafted, cartoonish 3D rendered stereoscopic western town. A haunted one. Your job is to survive the attacking ghouls by shooting them with your 6-shooter before they overwhelm you, or their snipers get you. Lots of interaction and I feel RSI coming on with the number of reloads I need to perform. This is the first VR to get my blood pressure up as the pressure to be accurate and reload in a short time builds.
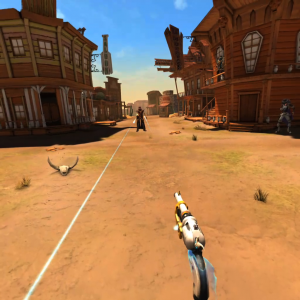
The multiplayer choice puts you in a tournament of quick-draw duels with live opposition. I was justly taunted by some youth speaking another language as I lost abysmally. I need to be more accurate and faster on the draw and reload. It is incredibly satisfying to beat the other guy. Since your oculus name is displayed here, and the others are strangers, I really wish I had set a non-identifying username.